Phone Wire Modeling.
Phone wire is another simple exercise where I just have to use CV Curve tool, using create NURBS primitive > circle option then selecting both object created and extruding it under surfaces drop down menu.
Then selecting the nurbs circle primitive, adjust the inputs of the extrude by changing the use component to "Component pivot" and rotation to 5000. Then use the rotate, scale and control vertex tool to adjust the phone wire.
Reflection: I think following the video for tutorial is better than reading it through pdf. It is much clearer but both ways are fine anyway.
Washing Board Modeling.
Washing board exercise is the first time I make use of the "Align tool" to easily align the parts together rather than manually moving them to their places. Similarly as being careful for other exercises, I have to slowly click on the faces/edges that have to be extrude/bevel slowly as there were so many line grids that I may wrongly click.
Clicking on the wrong ones will end up having the different outcome than what is wanted. Thus, toggling the view is important too. Then slowly creating part by part, starting with the top header, top panel, top stringer, bottom stringer, and leg left and right.
Reflection: Creating and learning different objects makes Maya already interesting to me. I just have to follow the steps given diligently and then carried it out on Maya.
Race Track Modeling.
I think race track is the longest exercise i spent time on because of first, not be able to click control Z to undo a wrong part I clicked and redoing the whole thing again. This exercise plays around with the faces and doing a lot of extruding too.
I also learn a new tool of creating Deformers > Nonlinear > Bend. This is where it allows the straight track to bend into a curve track.
Reflection: This exercise really thought me of choosing my vertexes correctly and accurately and not to rush on the things I'm doing. Doing it slowly and accurately will help me to save more time rather than wanting to finish it fast but ended up redoing it again and again.
OCEAN.
Something different from what we normally did with other exercises. This ocean effect is a simple exercise where I just need to click a create ocean button then adding a preview plane, expanding it to about the size of the grid then adding the light effect for the waves.
It then amazed me when clicking on the render view and it came out something like a real ocean effect! This exercise also shows me that Maya can make the ocean move and can adjust the speed of the movement and such.
Then adding in the cube, normally create a polygon and adjusting the size. Then I have to click the "make boat" option to make the cube floating on top.
Research: Researching on creating an ocean on Maya brought me to this page where it is from Maya software itself. It is more in detailed that I don't know about I am be able to do on Maya for the ocean exercise. http://download.autodesk.com/us/maya/2009help/index.html?url=Fluid_Effects_Nodes_oceanShader__ocean_texture.htm,topicNumber=d0e442141
Reflection: The only part that gave me problem was when I clicked the "make boat" option but the box still didn't make any motion. Luckily I get to overcome the problem and my box really looks like its floating in the ocean!
NURBS.
Bowl Modeling.
Mushroom Modeling.
This exercise replaced the bucket exercise and this exercise were done in class.
It was funny at first when I were introduced to "NURBS". NURBS stands for Non-uniform rational B spline that create curves and surfaces that cannot be done by just clicking on creating a polygon.
Research: NURBS are not as simple as rendering normal polygons. Here are what I found and read up on while researching about NURBS. http://www.pilot3d.com/NurbSecrets.htm
Reflection: This makes Maya more fascinating to me because the surfaces can be edited and make things look more realistic. Though having a red mushroom is not realistic, I am just playing around with the colours hehe.
Week 2; Lab 2: Cardboard Box Modeling.
By already learning how to play around with the vertexes and face, I learn how to make my cupboard look used. I also learn to make use of the tools to open the lit of the box rather than it just stay close. Plus making the lit look used also make it more realistic looking since its 3D. Adding colour also play a part in making the box look better and real.
Reflection: This box exercise thought me how the vertex can change the look of the object. It was just normal rectangular looking box at first but changes to crumpled used box after playing around with the vertex.
Week 2; Lab 1: Blocks Modeling.
Learning how to model each of the above blocks step by step really
helped a lot in order to successfully model my toy train.
I learn how to make a whole in a any size of block using boolean difference too.
Toy Train Modeling.
Process of creating the toy train just to resize the cube into a rectangle for the train base and resize the size of cylinders to create small 8 wheels for the train. Rendering on the top rectangle on the edges and beveling it to make the engine look of a train. Adding on the cone for the chimney on the engine, then beveling the roof and followed by using boolean function to create the holes in the driver's cabin (as shown below).
Train Front View:
Train Back View:
Train Coloured:

This is the train I learnt to model after learning modeling of blocks. I think it is a good practice for me for my project of modeling my own toy. I learn how to bevel and also colour my object. I also think that it is a good example for me to practice on because of the variety of shapes that it is made up with. There are cubes, cylinders, cones and also thought to have a hollow spaces in object. As thought to use boolean difference to create a hole for the tunnel above, I did the same for the train because it is the same concept of creating holes. Colouring the object by assigning new material, were also thought thus allowing me to know how to colour the train according to the original picture.
Research: Boolean function helps a lot in modeling our model. Here are some research guides on boolean.
1) http://www.webdesign.org/3d-graphics/tutorials/boolean-modeling.8233.html
2) http://www.youtube.com/watch?v=xMS1a8J8DeI
Reflection: I kind of enjoying playing around with Maya after a few exercises done. In my opinion, I think this is the most fun exercise because it really shows me how primitive shapes can formed into one cute toy train! It gets more interesting when I got to colour it and make it look real.
Week 2; Lab 2: Gear Exercise.
Gear Modeling:
Process of creating the gear first creating polygon "Pipe" in Maya. Then I have to edit the input of the subdivision height and caps to 4 and 3 respectively. This will allow me to select the faces I want to make it into a gear shape. After pulling or pushing the faces out, I have to edit the edges of the popped out gear parts to make it slightly pointy. I need to make sure the "Keep faces together" mode on too so it will not end up like the second picture.
By learning how to model this gear, it thought me about handling the
faces of an object. E.g. to make it pops out, to push it in etc. It also thought
me to be careful and make sure that I toggle to check around and be
sure of selected faces are the wanted ones. This is to ensure that
the not wanted face selected will not carry out the actions chosen.
Reflection: This gear exercise is also fun where I learn how to play around with the faces of an object. As the above steps mentioned, I learnt a number of points that I have to take note in ensuring lesser problems in the future while handling with Maya.
Week 1, Lab 2: Primitive Robot.
ORIGINAL ROBOT.
Process of creating the primitive robot for me I start from the top to the bottom. Starting from the head, by creating a sphere which same goes to the eyes of the robot. Then followed by the ears that I just have to create one side and duplicate it for the other side. After duplicating, I just have to set their placing of "Translate X" as the negative of the original so I don't have to go through the trouble to manually place it inline. Then followed by the body parts (shoulders, hand and leg parts), same method as for the ears too, only with different primitive shapes.
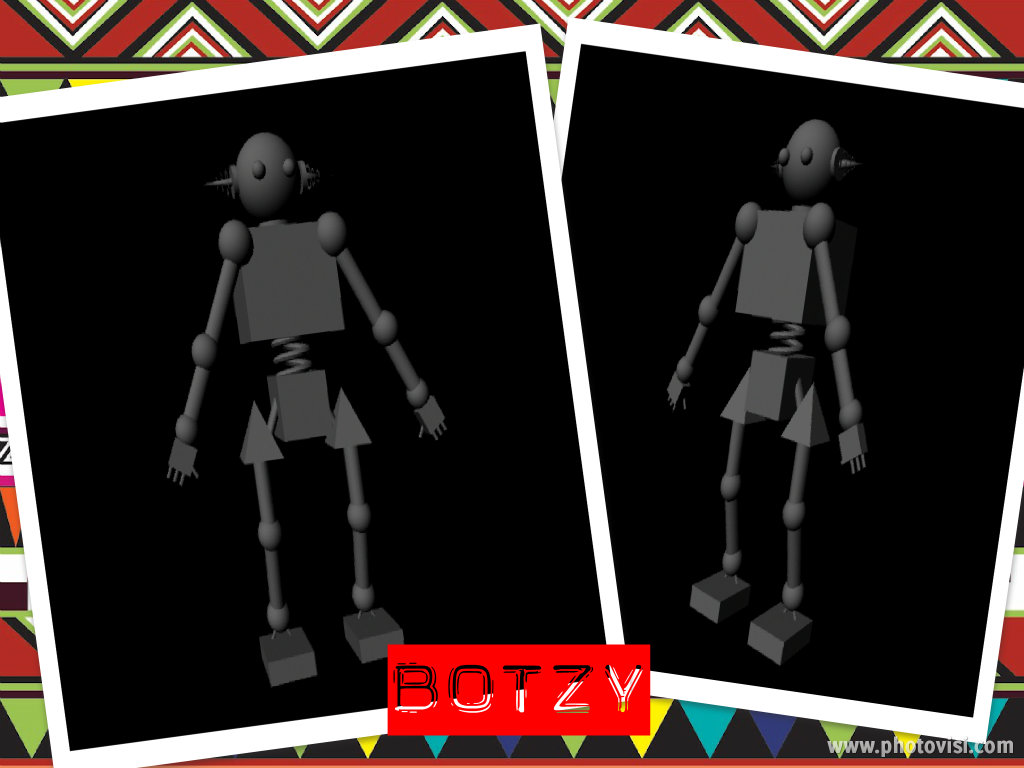
MODIFIED ROBOT.
Process of creating the modified robot, Botzy, is just adding the party hat then the hula hoop to make it look more funky and friendly. Adding prism to Botzy's chest make it look more attractive rather than the plain original robot.
Botzy is created to entertain and bring smile to people around him, he will entertain them by dancing with his hula hoop around his waist and also party dancing with the party hat on.
Dancing music will be played from the prism at his chest too. The spring shape that connects his body to his waist will allow him to bounce around coordinating with his dance moves and the music.
This will make people feel at ease with the music and will feel like dancing together with him too, to release the stress they are feeling. Botzy is very user-friendly robot and also caring about others.
Reflection: This is my first time modeling something on Maya. I think it is quite fun when handling with the tools on Maya and learning the functions of the mouse button etc. It gets interesting when I get to modify the original robot to my own creation of robot and I felt proud for my first achievement in Maya.